I kind'a have to figure out for myself in what order I should build, but I can take measurement and point & click for information directly in the eDrawing. As I mentioned before; none of the bags are marked with its content. This also goes for the 24 bags of nuts & bolts... Lucky me I have a calliper.
This made the night fly by when I built the frame. I got more bold and drilled all holes immediately after I checked the size on the drawing. There are basically 3 sizes, 8mm, 4mm and 3mm.

The frame is still put together loosely so I can adjust things into their right place later. It was late and I had to disassemble it a couple of times because I had forgot a washer or two...
The approach I used was to first prepare the sides, then mount all together leaving one side open to mount as the last piece.
Do not drill the "half" holes. These are suppose to lock the rod in place with friction!
The most difficult part at this stage was to get the M4 NYLOCKs inplace.
 These are supposed to be inset into the plastic, but the space is miss shaped and I had to use a small pointy rasp to make it larger. Then I could insert a M4 screw from the other side (right) and the then force the NYLOCK in place by tightening the M4 (did this make sense?).
To the right you can see the rod locked in place. DO NOT DRILL THIS HOLE!
The bearings are stacked with a lot of washers and goes in the same way everywhere for the belt drive.
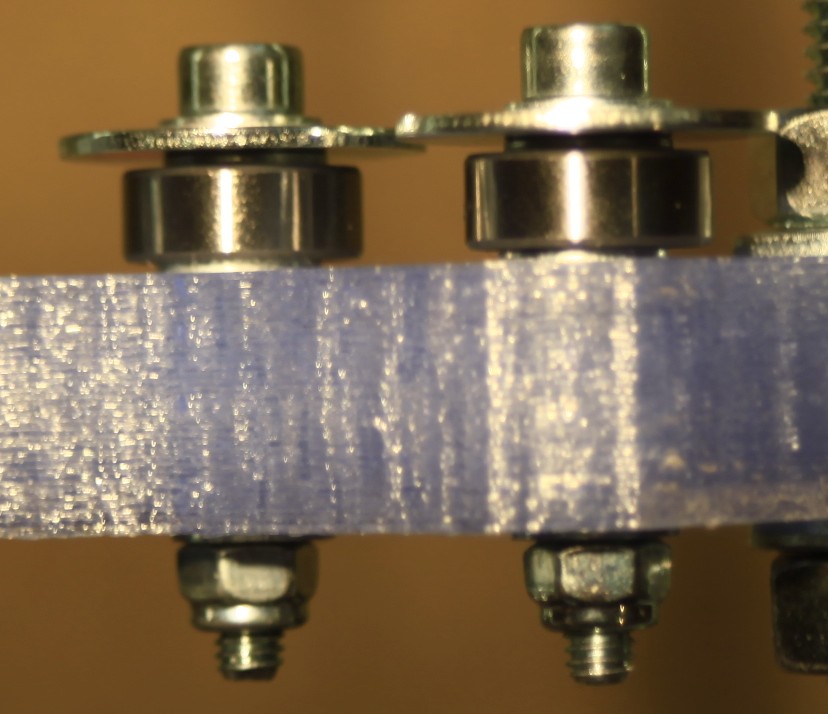 Top - to bottom:
M4 smal washer
M4 large washer
M4 smal washer
Small bearing (qute? :)
M4 small washer
Plastic piece
M4 small washer
M4 NYLOCK


Assembled with the sensor bracket.
The most tricky part here was, again, the inset for the M4 MYLOCK for the middle M4 screw, going through the whole spring.
Here I used the same method as before to get the NYLOCK in place.
The sensor bracket will be interesting later when it's time to mount the gap sensor. I would prefer a reflex sensor, smaller and cheaper, maybe I change this later... The space for the sensor cables is very tight (the height of th M4 NYLOCK). In this space the the crimped pins should bend 90 degrees.
I then started with the roll bed, but It was so late I decided to roll into my own bed...
No comments:
Post a Comment